This shop has been compensated by Collective Bias, Inc. and its
advertiser. All opinions are mine alone. #TubeFree #CollectiveBias
As you may know from some of my more recent Instagram posts,
I’ve challenged myself to a 30 day mind, body, spirit overhaul during the month
of October. I was feeling run down and becoming aware of what I was fueling my
body with and the products I was using throughout my home. I was on a mission
to transform my way of living and to be more conscience of my actions that not
only affected me and my peers but also the environment. Which brings me to Scott®
Tube-Free Bath Tissue!
Did you that over 17 billion toilet paper tubes are used
each year? That's enough to fill the Empire State Building…twice!! Per YEAR! Scott Tube Free delivers unscented premium
softness, without the wasteful cardboard tube. It’s also made with Forest
Stewardship Council (FSC) – certified fibers which promotes the practice of
sustainable forestry for future generations.
 As a budget DIY and lifestyle blog I am very in-tune with
less waste and living a more eco-friendly life. Focusing on buying used to
lessen our carbon footprint and recycle already made products decreases
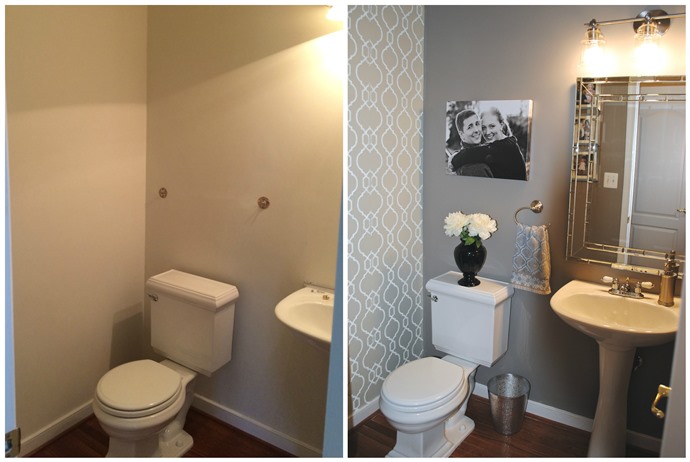
unwanted waste and the demand for new manufacturing. To store or display your tube-free toilet paper in your bathroom, think of using items from second-hand
markets. Using finds from these
markets and transforming them into something beautiful is upcycle friendly!
Some starter ideas of what you can use are baskets, buckets, crates, vases, laterns, candle holders, or magazine racks. You can also use leftover wood from projects to create a fun family-friendly DIY industrial pipe toilet paper holder, just like this one!
As a budget DIY and lifestyle blog I am very in-tune with
less waste and living a more eco-friendly life. Focusing on buying used to
lessen our carbon footprint and recycle already made products decreases
unwanted waste and the demand for new manufacturing. To store or display your tube-free toilet paper in your bathroom, think of using items from second-hand
markets. Using finds from these
markets and transforming them into something beautiful is upcycle friendly!
Some starter ideas of what you can use are baskets, buckets, crates, vases, laterns, candle holders, or magazine racks. You can also use leftover wood from projects to create a fun family-friendly DIY industrial pipe toilet paper holder, just like this one!
This toilet paper storage option is fabulous for a kid's bathroom with the fun sayings (you can also make this without the sayings for more of a industrial/chic look in your bathroom). Here are the simple details on how to make one of your own:
Supplies:
- Wood board (I used a leftover 1"x6" board)
- Pen or Pencil
- Tape Measurer
- Stain (I used leftover miniwax red oak)
- Staining Rag and Rubber Gloves
- Sand Paper or Sanding Sponge
- Galvanized Pipe (3/4"X18"long)
- Galvanized Floor Flange (3/4")
- 6 screws (I used 4 hexagoal screws for the flange attachment and 2 regular 1" screws for the backing)
- Mitter Saw
- Screwdriver
- Optional - paint pen

Directions:
- Cut the wood - base was cut to 6" and the stand was cut to 19"
- Sand the cut edges of the wood
- Stain the wood
- Optional - Measure even spacing to write sayings:
- Top - "Good to Go"
- Second - "Do A Chore Grab 2 More"
- Thrid - "If You Have To Pee Grab 3"
- Fourth - "Oh Crap"
- Attach flange to wood base with screws
- Screw on pipe to flange
- Attach wood backing to wood/pipe base with screws


Lucky for me I am blessed with a Rite Aid right below my work building which is super convenient for quick necessity shopping. It also gets me in trouble because they always have great sales that I go in for one or two things and end up with a huge shopping bag I have to commute home with!

Toss the tube for good! Go tube free!