Loves The Find

Monday, May 19, 2014

Lucketts Spring Market

What a perfect day to shop on Sunday! The Lucketts Spring Market was held this weekend and it was amazing!! Wonderful vendors that had an array of items from antiques, flea market gems, chalked painted/repurposed furniture and custom made masterpieces. It really offered something for everyone and in every price range.

The Old Lucketts Store is located in gorgeous horse and wine country of Leesburg, VA. It is such an oasis just an hour outside the hustle and bustle of the DC metro area. The Store also features a monthly interior design house. It enables you to really envision the most creative way to put together a beautiful home while incorporating modern, vintage, and creative ways to decorate your home.

Hope you enjoy some of my snapshots from the day J


I cannot wait to try this on my own! What a great chair!!

 
The Design House


http://luckettstore.com/ 

Monday, March 10, 2014

Vanity Affiar

So I have a slight obsession with vanity tops…although not all were DIY projects, you can really transform a bathroom with focusing your accents around your vanity top.

Luckily, with my four trips to Afghanistan I was able to pay for all four of our home’s bathroom vanities. I also had free plumber in-house so that saved a lot on labor costs for hooking up the new fixtures J

Key lessons:

1.       Look for remnant pieces at your local granite store. These change daily, so if you don’t like something the first time you look, go another day. Don’t rush!

2.      If you have a friend or family member who can reattach your faucet and plumbing ties after installation, you will save a TON!! The granite place wanted $100 for each plumbing hookup because they have to subcontract a plumber to come in.

3.       Look for sale accent items.

The first vanity change was the “man cave” bathroom (Willie is very lucky, I always put his needs first J). This amazing green granite was a remnant so we got a great deal on it! Adding the sage green paint, new fixtures, and some accents, this bathroom is a perfect addition to Wilie’s man cave. Willie just recently added a speaker to the ceiling and some crown molding, which I have to admit turned out A LOT better than I thought it would for his first time.

Second project we tackled ourselves with a standard size granite top from Lowe’s. We then transformed the bathroom with a clearance rug and shower curtain from Lowe’s, new fixtures, and a beautiful storage cabinet. The finishing touch was the amazing gold mirror we found at Marshalls for only $29.99!!

After
Before


Third project was our master bedroom. This was probably my favorite transformation. We got another amazing deal on this remnant exotic granite. The uniquely shaped squared sinks gave this master bathroom the little kick into the 21st century. We finished the bathroom off with antique fashioned faucets and mirrors from Kohls.

Looks like space, doesn't it? So cool!
Before

After
Last project, for our main floor...a rustic inspired bathroom. First thing, getting rid of wallpaper and painting! We also added crown molding to match the rest of the main floor. I really lucked out finding this stunning remnant of this grey exotic marble. Again, new faucet (we choose a water trough spout to go with the rustic theme), new rustic mirror from Marshalls. AND finally our DIY projects. Willie transformed the light fixture using mason jars we found at the thrift store and created a toilet paper and towel holder using pipes! I will take credit for that idea, but he always knows how to make it J

Before...like the wallpaper? :)


After


I say we’ve done pretty good…now what to do next?

Friday, February 21, 2014

Pallet Wine Rack

Another amazing DIY project using free pallet wood. Who knew a pallet wine rack would be so elegant!


Here are some simple DIY steps to make one of your own:

To start:

Cut the pallet in half (leaving the center support of the pallet). So you will have 2 big halves and 1 center strip. Using the center strip pry off the long board and nail it to the bottom of the half cut in the first part (so u have a basket to hold the wine.) DONE! Willie also drilled 3 holes with a center drill bit so we could put the 3 bottles upside down.


To create the wine glass holder:

1.       Need to buy from Lowes (or local hardware store)
a.       1 ½ nails or so. (or whatever you have around the house)
b.      1” (thick) x 2 wide X 8ft (length) craft board  ($4)
c.       ¾(thick) x 4”(wide) x 4ft (length) ($4)

2.       Cut one 4ft long of (a.) then screw it to the back (making a stopper)
3.       Cut strips of (a.) to create a pathways for the wine glass to slide into (this will require measuring between so they are straight and even)
4.       Cut (b.) to the width of the pallet and screw b onto a) to create a holder on the pathway so the wine glass don’t fall out. (center each one so they look straight and even)
 
Happy woodworking J
*PS- to make the piece extra special, fill your wine rack with custom labeled wine bottles. Ours were created by my maid of honor for our engagement party and rehearsal dinner. I absolutely LOVE them!


Thursday, January 30, 2014

Wedding Bliss

The past 7 months as a newly married couple has been a whirlwind!

I finally had a moment today to go through all of our wedding photos again and I couldn’t believe that I never shared our astonishing DIY/antique accented dessert table display.

When we decided we were going to be married at a winery I immediately knew I wanted a dessert table display using wine barrels. How I was going to do this exactly I wasn’t sure, but I made it work!

My florist (also a family friend) found antique doors at The Old Lucketts Store in Leesburg, VA.  We used these as the table top for our cake displays. The winery we were married at supplied the 3 barrels we used as our base.
Then we solicited the help of a family friend to cut a large piece of wood and assembled the pieces into a tiered stand using PVC pipe. Once completed, a finishing touch of polyurethane really made the stands shine (literally J). Willie and I covered the PVC by wrapping thick twine around the pipe and hot gluing the ends. And voila! Beautiful, unique, rustic cake stands!


They definitely were the centerpiece of our wedding reception room! Our guests absolutely loved it!

Many thanks to Cakes by Cathy Stewart and The Apple House for the yummy treats to use on our display!!


Monday, December 2, 2013

Shabby Chic Dining Room


So the Craigslist ad worked and I had to say goodbye my inherited 70’s black lacquer table that I reupholstered and brought back to life three years ago. I get a little emotional about furniture and it was hard to give up, but I knew I wanted something different, something glam, something that oozed shabby chic and I think I achieved that with my new crisp chalk painted antique table!


The story behind the new table…

I’m lucky enough to have a great group of friends from my years of competing horses. We have such a strong bond that was fostered by our love and devotion to our horses. Even though most of us are out of the sport, we still get together for parties, wine nights, and do practically everything together. I cherish the moments with these wonderful women because I know they will always be there to support and love me. Thanks ladies!

Anyways, one of those wine nights, Mrs. VP (AKA- my barn mother) mentioned she was trying to sell her dining table on Craigslist. I immediately popped up from the couch and exclaimed “I want it”. I ran over an inspected the table. With all the joyful experiences the table witnessed over the years it had minor dents and scratches, which made it a perfect candidate for the Annie Sloan Chalk Paint.

Thanks to a friend, the table was safely delivered to our townhouse and I was ready to paint.


DIY time…

Chalk Paint is not sold everywhere. Use this link to find a location close to you. I pick Old White with the clear wax. http://www.anniesloan.com/acatalog/North_American_Stockists.html. I found mine at a great store in Falls Church, VA called Stylish Patina. Chalk Paint is a little pricy, but it goes A VERY LONG WAY! I did the whole dining set with just 1 can!!! It’s also so worth it not having to sand or prime! Follow labeled directions for painting and waxing your piece. I didn’t use the Annie Sloan paint brush (way too expensive). If you have a Harbor Freight near you or something similar just buy their medium grade brushes. They work perfectly and for half the price. We bought 10 brushes for $15.


Before painting, remove your seat cushions and wipe down the entire furniture surface.


For the chairs I had a really hard time finding a budget friendly fabric I liked. Willie thought of a great idea to go to HomeGoods and use curtain fabric. We bought two 40” x 84” curtain panels for $19.99 compared to the $80 I would have spent at a fabric store was such a great budget saving option! Getting the old fabric off is the hard part, but then very easy process to measure, cut, and staple the new fabric on.


Last touch to my new dining room was getting rid of the hideous ceiling fan and replacing it with a chandelier and ceiling medallion. Props to my amazing husband who surprises me every day with his handyman abilities!

And voilĂ …my beautiful new dining room. I hope you all love it as much as I do!! I’m so ecstatic to share new family memories at this table. I can only hope it brings as much togetherness as it did for the VP Family.


My awesome table at Christmas with a stunning floral display from a very talented friend.


Friday, November 8, 2013

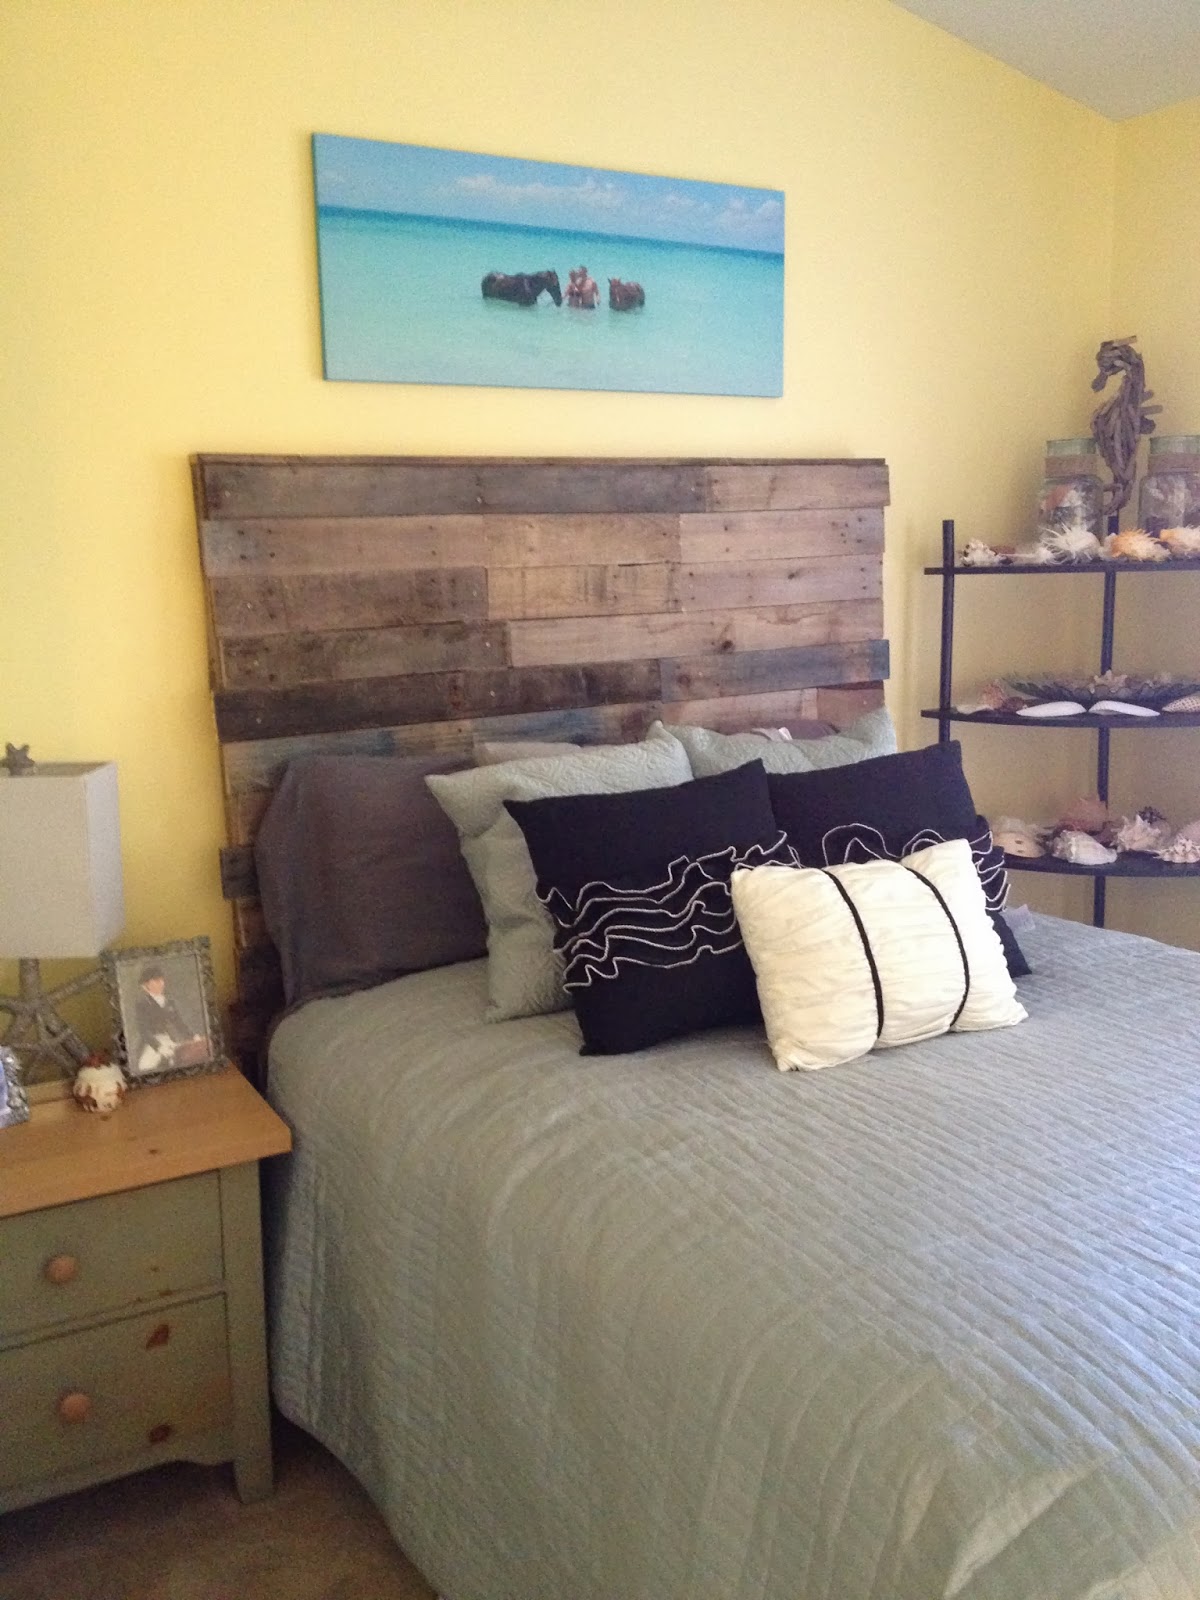
Game Day DIY Pallet Headboard

I had been seeing all these amazing projects made out of wooden pallets on Pinterest and I couldn’t help myself from trying one on my own.


We had a little embarrassing snafu trying to find free pallets outside stores (FYI- even though some businesses put them out by the trash, apparently they aren’t trash and aren’t free). Luckily, Willie’s father is close friends with a man who own a garbage company and does large pickups that normal trash days don't cover. So in 2 days, Willie’s Dad had 3 beautiful big free pallets waiting outside our garage for us.


On Saturday, Willie created the frame using our bed measured dimensions with four 2X4s. He also inserted some metal corner moldings to make the frame more secure.

The next day (football Sunday), Willie started his morning by dissembling the pallets. Willie wrestled with the pallets to pry the boards off, which not always worked and resulted in the board getting a blade run through it, but in the end we had workable boards for our headboard. Then it was time to play Jenga! Trying to make the boards fit together and lineup was the most time consuming task because even though it’s a “rustic look” we wanted it to be a “perfect rustic look”. So about 2 hours of puzzling the boards together we finally screwed everything in just in time for the 1pm Sunday football game. Willie let me take one photo of him and he was off to have a beer and relax watching football.

I was so happy with the way the headboard turned out. Such a fun cheap project with wonderful results!

Three Pallets = $0 FREE
Four 2x4s = $12
One 1x3=$4
Metal corner frames = FREE (We had them in the house but they cost like $3)
Screws = $6

Our Total Cost was only $22


*He normally doesn't look this ridiculous, but supporting Movember :)